
If you’re confused and wondering, “Why does my stick welding rod keep sticking?”, you’re not alone. This is one of the most frustrating problems beginner welders face. Instead of creating a smooth, stable arc, the welding rod can freeze or stick to the workpiece.
Many beginners think their welding machine is faulty, but in most cases, the real problem is incorrect welding settings, poor technique, or improper electrode handling.
Your stick welding rod usually keeps sticking because the amperage is too low, the arc length is too short, the metal or work clamp connection is dirty, the electrode is damp or damaged, or the arc is being struck incorrectly. Increasing the amperage slightly and maintaining a proper arc length usually solves the problem.
What to Check First If Your Welding Rod Keeps Sticking
- Check the amperage setting.
- Inspect the work clamp connection.
- Clean the metal surface.
- Check that the electrode is dry and undamaged.
- Verify the correct polarity.
- Use the scratch or tap method to start the arc.
- Maintain a short, consistent arc length.
In this beginner-friendly guide, you will learn:
- Why stick welding rods stick to metal
- Common SMAW welding mistakes beginners make
- How to stop welding rods from sticking
- Correct stick welding techniques for beginners
- Easy fixes to improve arc stability and weld quality
Table of Contents
Why Does My Stick Welding Rod Keep Sticking?
Stick welding rod sticking usually happens when the arc cannot stay stable. Instead of maintaining heat and electrical flow, the electrode grabs the metal surface and freezes.
This problem is extremely common in:
- Beginner stick welding
- Low amperage settings
- Poor arc striking technique
- Rusty or dirty metal surfaces
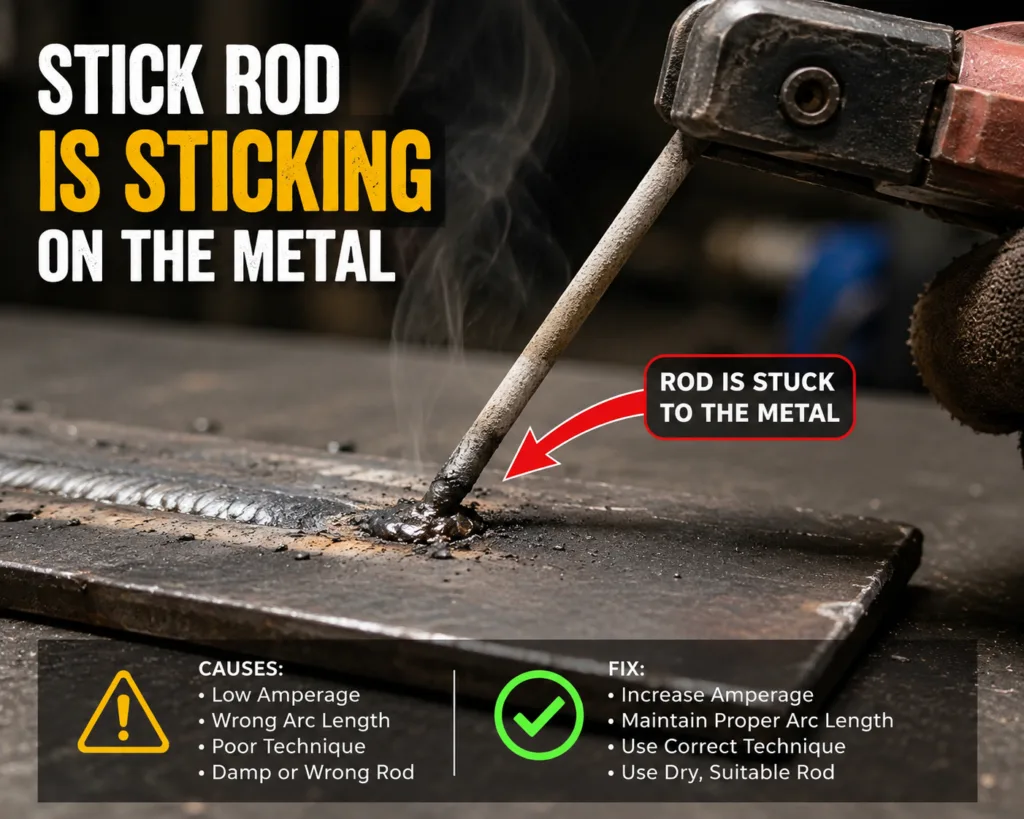
The good news is that small adjustments can completely improve your welding results.
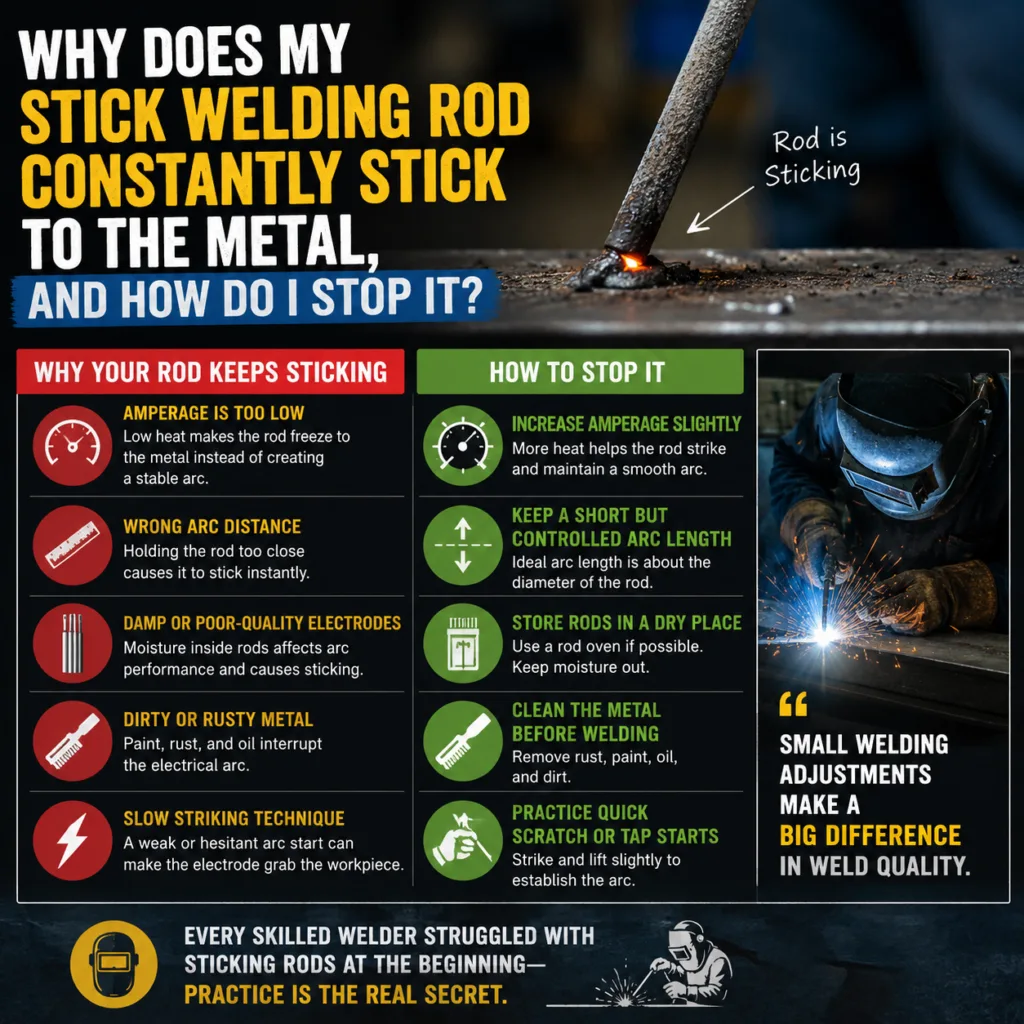
1. Your Welding Amperage Is Too Low
The most common reason a stick welding rod sticks to metal is low amperage.
When the welding current is too low, the electrode does not generate enough heat to maintain the arc. As a result, the rod freezes to the metal surface.
Signs of low amperage:
- Rod constantly sticking
- Weak or unstable arc
- Poor penetration
- Irregular weld bead
- Difficulty starting the arc
How to Fix It
Increase the amperage slightly and test again.
For beginner welders, even a small adjustment can make a huge difference in arc stability and weld quality.
Typical examples:
- 3/32″ E6013 rod: around 70–90 amps
- 1/8″ E6013 rod: around 90–130 amps
Always follow the electrode manufacturer’s recommended settings.
2. Incorrect Arc Length
Another common beginner welding mistake is holding the rod too close to the metal.
In stick welding, maintaining the correct arc length is critical. If the electrode touches the workpiece too much, it will stick instantly.
Correct Arc Length for Stick Welding
A good rule:
- Keep the arc length about equal to the diameter of the electrode core wire.
If the arc is:
- Too short → rod sticks
- Too long → excessive spatter and unstable arc
Learning proper arc control takes practice, but it is one of the most important stick welding skills.
3. Damp, Contaminated, or Damaged Electrodes
Moisture inside welding rods can seriously affect welding performance.
Wet electrodes create:
- Arc instability
- Porosity
- Excessive sticking
- Weak welds
Beginner welders often overlook proper rod storage.
How to Prevent Electrode Moisture
- Store rods in a dry place
- Keep electrodes sealed when not in use
- Avoid exposing rods to humidity
- Use fresh, quality electrodes
Proper electrode storage improves both weld quality and arc starting.
4. Dirty, Rusty, or Painted Metal
Stick welding on dirty metal can interrupt electrical flow and cause sticking problems.
Rust, paint, oil, and mill scale create resistance that affects arc stability.
Before Welding:
Always clean the workpiece using:
- Wire brush
- Grinder
- Sandpaper
- Chipping hammer
Clean metal helps produce:
- Easier arc starts
- Better penetration
- Stronger welds
- Less sticking
5. Poor Arc Striking Technique
Many beginner welders struggle with starting the arc correctly.
If your movement is too slow or hesitant, the electrode may stick before the arc forms properly.
Best Arc Starting Methods for Beginners
Two common techniques:
- Scratch Start
- Tap Start
The key is making a quick, confident motion instead of slowly pressing the rod into the metal.
With practice, arc starting becomes much easier.
6. Incorrect Polarity or Machine Settings
Some stick electrodes perform better with specific polarity settings. Using the wrong polarity can make the arc difficult to start or maintain and may increase sticking, spatter, or poor penetration.
Before welding, check the electrode manufacturer’s recommendations and confirm that your machine is set to the correct output and polarity for the rod you are using.
7. Poor Work Clamp Connection
A loose or poorly connected work clamp can cause an unstable electrical circuit. If the clamp is attached to rusty, painted, dirty, or loose material, the welding current may not flow properly.
For better arc stability:
- Attach the clamp to clean bare metal.
- Keep the clamp close to the welding area when practical.
- Check for loose cable connections.
- Inspect the clamp for damage.
Best Welding Rods for Beginners
Some welding rods are easier for beginners because they produce a smoother arc and are more forgiving.
Popular beginner-friendly electrodes:
- E6013
- E7014
- E6011 E6011 – useful for penetrating through rust, paint, and less-than-perfect surfaces, although cleaning the metal is still recommended.
E6013 is often recommended for beginners because it is easier to control and restrike.
Still having trouble with your stick welding rod? Choosing the right electrode can make a big difference. Check out our guide to the best welding rods for beginners to find the right rod for easier arc starts and better welds.
Stick Welding Amperage Settings Chart
The correct amperage depends on the electrode type, electrode diameter, material thickness, welding position, and machine. However, this general chart provides a useful starting point for beginners.
| Material Thickness | Recommended Electrode Diameter | Starting Amperage Range | Best For |
|---|---|---|---|
| Up to 1/8 in (3 mm) | 1/16 in (1.6 mm) | 20–40 A | Very thin metal |
| 1/8 in (3 mm) | 3/32 in (2.4 mm) | 40–80 A | Thin steel |
| 1/8–3/16 in (3–5 mm) | 3/32 in (2.4 mm) | 70–90 A | General beginner projects |
| 3/16–1/4 in (5–6 mm) | 1/8 in (3.2 mm) | 90–130 A | Medium-thickness steel |
| 1/4–3/8 in (6–10 mm) | 1/8 in (3.2 mm) | 110–150 A | Structural and fabrication work |
| 3/8–1/2 in (10–12 mm) | 5/32 in (4.0 mm) | 140–190 A | Heavy steel |
| Over 1/2 in (12 mm) | 5/32–3/16 in (4–4.8 mm) | 170–250 A | Heavy fabrication |
If your stick welding rod keeps sticking, increase the amperage slightly—usually by 5 to 10 amps at a time—until you can start and maintain a stable arc without excessive spatter or burn-through.
Important: Always check the recommended amperage range printed on the electrode package, as settings can differ between E6010, E6011, E6013, and E7018 electrodes.
Common Stick Welder Problems and How to Fix Them
As an experienced welding instructor, I have seen many beginners assume that their stick welder is defective when the real problem is often much simpler. Incorrect machine settings, poor electrical connections, wrong electrode selection, or basic technique issues can all cause welding problems.
Here are the answers to some of the most common questions beginners ask.
Why is my stick welder not arcing?
If your stick welder is not arcing, first check the electrical connections and work clamp. A poor ground connection is one of the most common reasons an arc will not start. Clean the area where the work clamp is attached and make sure it has good contact with bare metal.
Also check that the welding rod is properly installed in the electrode holder and that the amperage is suitable for the electrode size. If the amperage is too low, starting and maintaining an arc becomes difficult. Finally, inspect your welding leads and connections for damage or loose terminals.
Why is my stick welder burning through metal?
Burn-through usually happens when you are welding thin metal with too much heat. Your amperage may be set too high, your welding rod may be too large, or you may be moving too slowly.
To reduce burn-through, lower the amperage and use a smaller electrode suitable for thin material. Keep the arc length short and move at a steady speed. For very thin metal, avoid staying in one location for too long because excessive heat can quickly melt through the workpiece.
Why is my stick welder not working?
When a stick welder is not working, start with the basics before assuming the machine has failed. Check the power supply, plug, circuit breaker, welding leads, electrode holder, and work clamp.
Make sure all cable connections are tight and undamaged. Also verify that the correct polarity and welding settings are being used for your electrode. If the machine has power but still produces no output, stop using it and have it inspected by a qualified technician.
Why is my stick welder shocking me?
A stick welder can give you an electric shock if you come into contact with exposed electrical parts, damaged cables, or a faulty electrode holder. Wet gloves, wet clothing, damp working conditions, and poor insulation can significantly increase the risk.
Never ignore electric shocks while welding. Stop welding immediately and inspect your equipment. Make sure your gloves and clothing are dry and undamaged, and replace damaged leads or electrode holders. If you are unsure about the condition of the machine or electrical supply, have it checked by a qualified professional.
Why does my stick welder stick?
If you are wondering why does my stick welder stick, the problem is usually related to low amperage or incorrect arc-starting technique. When the electrode touches the metal and does not have enough power to establish an arc, it can freeze to the workpiece.
Check that your amperage matches the electrode type and diameter. Start the arc using a light tapping or scratching motion, then quickly lift the electrode to maintain a short arc. A common beginner mistake is pressing the rod against the metal instead of lifting it immediately after striking the arc.
How to Stop Welding Rods From Sticking
To stop a welding rod from sticking, start by checking your amperage setting. Low amperage is one of the most common reasons an electrode repeatedly freezes to the workpiece. Set the amperage according to the electrode type and diameter, then make small adjustments if necessary.
Next, use the correct arc-starting technique. Lightly scratch or tap the electrode against the metal and immediately lift it to create a short arc. Do not press the rod against the workpiece for too long. Once the arc is established, maintain a consistent arc length and continue feeding the electrode toward the weld as it burns away.
Also make sure the work clamp has a clean, secure connection to bare metal. Poor electrical contact, loose welding cables, and damp or damaged electrodes can also contribute to sticking problems.
Correct Stick Welding Techniques for Beginners
Good stick welding technique begins with a stable body position and proper control of the electrode holder. Hold the electrode at the correct travel angle and maintain a short, consistent arc length. For most beginner welds, try to keep the arc approximately equal to the diameter of the electrode core.
As you weld, move steadily along the joint without travelling too fast or too slowly. Remember that the electrode becomes shorter as it burns, so you must gradually move the electrode toward the workpiece to maintain the correct arc length.
Practice starting the arc several times before focusing on producing a perfect weld bead. Learning how to strike and maintain an arc is one of the most important skills for a beginner stick welder.
Easy Fixes to Improve Arc Stability and Weld Quality
If your arc is unstable, start with these simple checks:
- Adjust the amperage to match the electrode diameter and welding position.
- Clean the workpiece to remove rust, paint, oil, and other contaminants.
- Secure the work clamp directly to clean metal.
- Keep a consistent arc length throughout the weld.
- Use dry, properly stored electrodes when required.
- Check welding cables and connections for looseness or damage.
- Maintain a steady travel speed to avoid an uneven weld bead.
My Advice as a Welding Instructor
When troubleshooting a stick welding problem, always check the simple causes first: power supply, work clamp, cable connections, electrode condition, amperage, and welding technique. In my experience, many beginner welding problems can be solved without replacing the welding machine.
However, when dealing with electrical shocks, damaged cables, burning smells, overheating, or internal machine faults, stop welding immediately and have the equipment inspected. Safety should always come before completing the weld.